Hands-on instruction in sawing, soldering, forming, and finishing wearable metalwork
Working at the Bench
Jewellery Metalsmithing Basics is a workshop for anyone who wants to learn the foundational skills of making wearable metal objects by hand. Offered through the Metal Arts Guild of Canada's partner studios and teaching workshops, this course covers the essential bench techniques that underpin all jewellery metalsmithing: sawing, filing, forming, soldering, texturing, and finishing. You work primarily in copper and sterling silver, completing a series of projects that build skills progressively and leave you with finished pieces you can wear or give away. No prior experience is required, though the workshop also serves experienced hobbyists who want to formalize self-taught skills.
The course runs over two full days or a series of evening sessions, depending on the host studio. Class sizes are kept very small, typically four to six participants, because jewellery work demands close supervision and individual feedback. All tools, materials, and consumables are provided. Sterling silver is included in the workshop fee, so you work with real precious metal from the start rather than practising on substitutes that behave differently under the torch and the file.
Day One: Sawing, Filing, and Cold Connections
The workshop begins at the jeweller's bench. Your instructor introduces the bench pin, the saw frame, and the hand file, three tools that will account for much of your working time throughout the course. You start by sawing copper sheet into simple geometric shapes, learning to thread and tension a saw blade, follow a scribed line, and turn corners without breaking blades. Blade breakage is normal and expected, especially in the first hour. The trick is to develop a relaxed grip and let the blade do the cutting rather than forcing it through the metal.
Filing follows sawing. You learn to hold a file at the correct angle and move it in long, even strokes to bring a sawn edge to a smooth, flat finish. Precision filing is one of the most important skills in jewellery metalsmithing because it determines how tightly parts fit together before soldering. A gap that seems insignificant to the eye will prevent solder from flowing and result in a weak joint. Your instructor demonstrates the standard of fit required, and you practise until your edges meet cleanly.
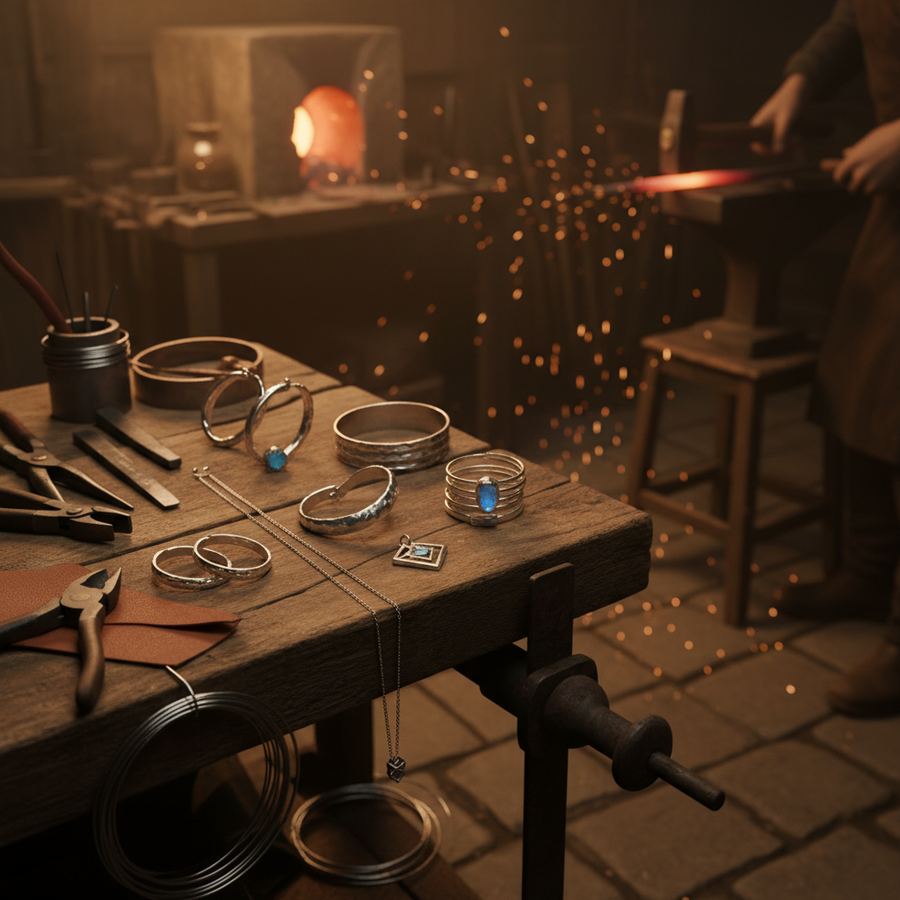
The first project is a pair of copper earrings assembled using cold connections. You saw two matching shapes from sheet, file the edges smooth, drill small holes, and join the components with wire rivets. The finished earrings require no soldering and no heat, which keeps the learning curve manageable on the first day. They also introduce a joining method that many jewellery metalsmiths use alongside or instead of soldering, particularly when combining metals that respond differently to heat.
Day Two: Soldering, Forming, and Finishing
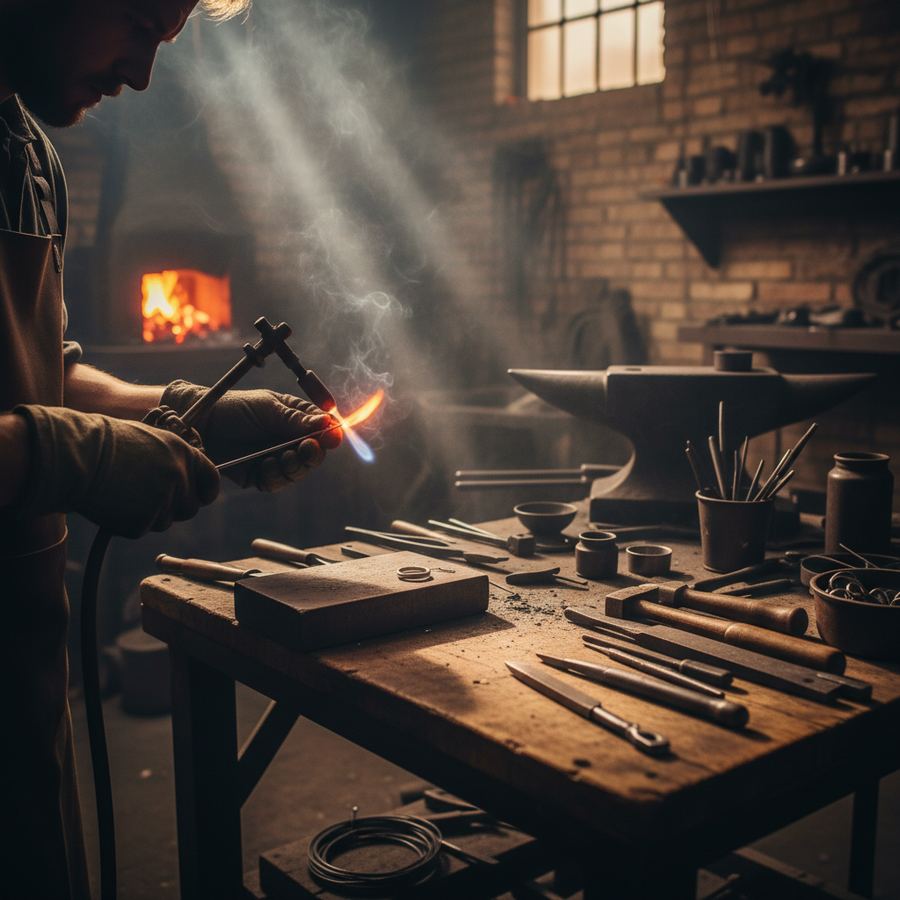
The second day introduces the torch. You learn to set up and light a small butane or propane-air torch, apply flux to prepared joints, place solder pallions accurately, and bring the work to soldering temperature with even heat. Soldering is the skill that opens up the full range of jewellery construction. Once you can solder reliably, you can build three-dimensional forms, set stones, attach findings, and create complex multi-component pieces. Your instructor demonstrates soft (easy) and medium solder on sterling silver, explaining how different solder melting points allow sequential soldering of multiple joints on a single piece.

The soldering project is a sterling silver pendant. You saw a shape from sheet, file it to final dimensions, add a texture using hammers or stamps, solder a bail to the back, and finish the surface to a standard that is ready to wear. The sequence is straightforward, but each step demands care and attention. Rushing the soldering produces overheated, fire-stained metal. Skipping the filing leaves rough edges that catch on clothing. The pendant teaches you that jewellery metalsmithing is a discipline of accumulated small precisions, each one contributing to a finished object that feels right in the hand and on the body.
Forming and Texturing
Time permitting, the workshop introduces basic forming techniques. You learn to shape flat sheet into curves using a dapping block and punches, to create gentle domes and concave forms that add dimension to flat designs. You also experiment with surface textures: hammer marks applied with a planishing or ball-peen hammer, stamped patterns made with letter or design punches, and roller-printed textures produced by passing sheet through a rolling mill with fabric, paper, or plant material. These techniques expand the visual range of your work dramatically and often spark ideas for future projects.
Finishing receives dedicated attention because surface quality makes or breaks a piece of jewellery. You learn to progress through grits of sandpaper, from coarse to fine, removing tool marks and scratches at each stage. You practise hand polishing with rouge on a felt pad and, at studios that have them, machine polishing on a buffing wheel. Your instructor explains the difference between a satin, brushed, and mirror finish, and you choose the surface treatment that best suits your pendant. Many beginning jewellery metalsmiths underestimate the time that finishing requires. A well-made piece can look crude if the final finishing is rushed, and a simple design can look refined if the surface is carefully prepared.
After the Workshop
Jewellery metalsmithing is a craft that rewards continued practice. The workshop gives you a solid foundation, but developing fluency at the bench takes time and repetition. Many host studios offer open studio hours where past workshop participants can rent bench time and tool access to continue working on their own projects. Some offer intermediate courses that build on the basics, covering stone setting, chain making, enamelling, and advanced soldering techniques. Your instructor can help you identify next steps based on the direction your interests take during the workshop.
To find a session near you, visit our workshops directory and look for listings in your province. Ontario and British Columbia offer the most frequent sessions, with studios in Toronto, Hamilton, Vancouver, and Victoria running regular cohorts. For a broader view of the jewellery metalsmithing scene in Canada, explore the craft overview on our site. The Society of North American Goldsmiths is another valuable resource for anyone pursuing metals and jewellery as a serious practice. If your interests run toward larger-scale work, consider pairing this workshop with an introductory blacksmithing weekend to experience the full spectrum of hand metalwork, from the bench to the anvil.
The skills you learn in this workshop are the same ones practised by professional jewellery metalsmiths whose work appears in galleries and fine craft shops across Canada. Several of the artists featured in our Emerging Makers Showcase started with a workshop exactly like this one. The distance between a first sawn line in copper and a finished sterling pendant in a display case is shorter than you might expect. It begins with a saw blade, a steady hand, and a willingness to let the metal teach you.